Whether you’re a seasoned golf enthusiast, an amateur player eager to improve your game, or someone who enjoys maintaining their equipment, knowing how to change the spikes on your golf shoes is essential. Worn-out spikes can affect your grip, balance, and overall performance on the course. In this comprehensive guide, we’ll walk you through everything you need to know about changing your golf shoe spikes. From gathering the necessary materials to step-by-step instructions and maintenance tips, you’ll be well-equipped to keep your golf shoes in top condition.

Materials Needed for Changing Golf Shoe Spikes
Before you begin, it’s essential to have the right tools and materials at hand. Here’s what you’ll need:
- Replacement spikes
- Spike wrench or pliers
- Brush or cloth
- Mild soap and water
- Towel
Having these materials ready will make the process seamless and efficient. Now, let’s get into the details of each step.
5 Easy Step-by-Step Guide to Changing Spikes
Step 1: Preparation
Before starting the spike replacement process, ensure you have all necessary tools and materials ready. This typically includes a spike wrench or a pair of pliers, and the new spikes you plan to install. It’s also a good idea to clean your golf shoes beforehand, removing any dirt or debris that might interfere with the process. Place your shoes on a stable surface to prevent them from moving around while you work. Having a well-lit area will also help you see the spikes clearly and make the process smoother.
Step 2: Removing Old Spikes
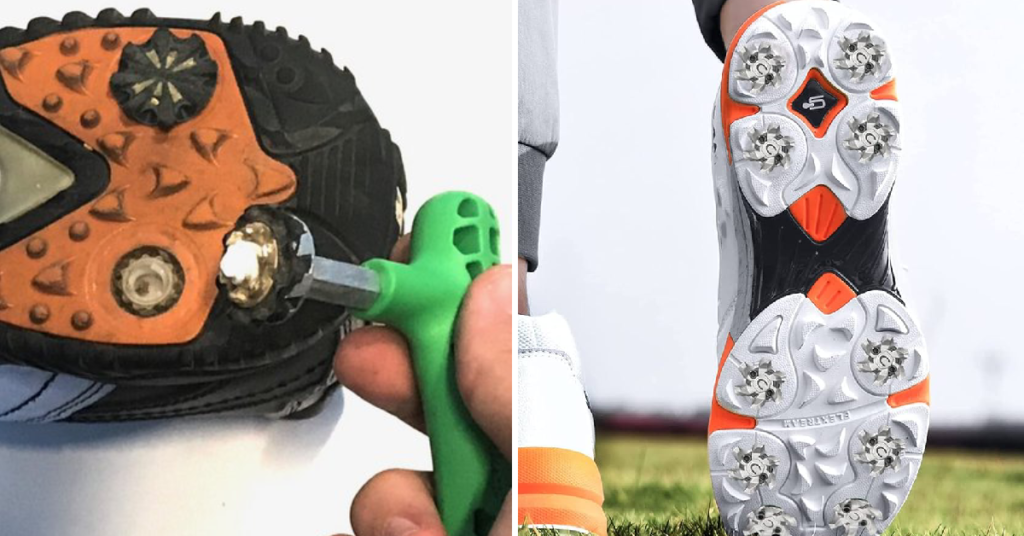
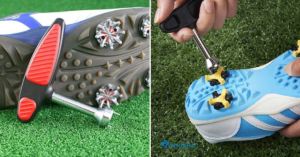
Begin by using the spike wrench or pliers to grip the old spikes firmly. Turn the tool counterclockwise to unscrew each spike from the shoe. If a spike is stuck, apply a little more pressure or use penetrating oil to loosen it. Be patient and careful not to damage the shoe’s sole while removing stubborn spikes. Once removed, set aside the old spikes for proper disposal.
Step 3: Cleaning the Spike Area
With the old spikes removed, inspect the spike receptacles for any dirt or debris that might have accumulated. Use a small brush or cloth to clean these areas thoroughly, ensuring that no residue remains that could affect the new spikes’ fit. This step is crucial as it helps ensure that new spikes can be installed securely and function properly. Additionally, check for any damage to the receptacles themselves, as this could indicate a need for further shoe repair. A clean and clear spike area will facilitate easier installation of new spikes.
Step 4: Installing New Spikes
Take one of your new spikes and align it with the spike receptacle on your shoe. Using your fingers initially, gently twist the spike clockwise into place until it is hand-tight. Then, use your spike wrench or pliers to tighten it further, ensuring a snug fit without over-tightening, which could damage the shoe or spike. Repeat this process for each spike on both shoes, making sure each one is securely fastened. Proper installation ensures optimal performance and stability on the golf course.
Step 5: Ensuring Proper Fit
Once all new spikes are installed, check each one to ensure they are securely fastened and sitting flush with the sole of the shoe. Walk around briefly to test their stability and comfort, making sure there are no loose spikes that could cause issues during play. If any spikes feel loose or uneven, tighten them again with your tool until they are secure. Additionally, visually inspect each spike to confirm they are all aligned correctly and none are protruding excessively. Ensuring a proper fit will enhance traction and overall performance on the golf course.
Troubleshooting Common Issues for Changing Golf Shoe Spikes
- Spikes Won’t Unscrew: If the spikes are stuck, try using a spike wrench with a rubber grip for better leverage. Soaking the spikes in warm, soapy water can help loosen any debris.
- Stripped Threads: If the threads on the spike or shoe are stripped, replace the spike with a new one and consider using a thread repair kit for the shoe.
- Wrong Spike Type: Ensure you’re using the correct spike type for your shoes. Check the manufacturer’s specifications to avoid compatibility issues.
- New Spikes Don’t Fit: If new spikes are difficult to screw in, double-check the sizing and ensure they are compatible with your shoe model.
- Spike Wear and Tear: Regularly inspect spikes for wear. If they’re worn down or uneven, replace them to maintain optimal traction on the course.
- Squeaking Noise: If you hear squeaking after changing spikes, check to ensure they are properly tightened and that there’s no debris trapped in the spike wells.
Maintenance Tips for Golf Shoe Spikes
Maintaining your golf shoe spikes is just as crucial as changing them. Regular maintenance can extend the life of your spikes and ensure consistent performance.
- Regular Inspection: Make it a habit to inspect your spikes before and after each game. Look for signs of wear and tear, such as flattened or broken spikes. Early detection allows for timely replacement, preventing potential issues during play.
- Cleaning: Clean your spikes regularly to prevent dirt and debris from accumulating. Use a brush to remove mud and grass after each game. For a deeper clean, remove the spikes and wash them separately with mild soap and water. Keeping your spikes clean enhances grip and prolongs lifespan.
- Rotating Shoes: If you play golf frequently, consider rotating between two pairs of shoes. This allows each pair to dry out and recover between games, reducing wear and tear. Rotating shoes also helps you adapt to different course conditions more effectively.
- Using Protective Covers: Invest in protective covers for your spikes. Use them when walking on hard surfaces like concrete to prevent quick wear. Protective covers are easy to slip on and off, extending the life of your spikes.
- Timely Replacement: Even with the best maintenance, spikes will eventually wear out. Keep track of the replacement timeline and replace them before they are completely worn down. Regular and timely replacement ensures you always have the best grip and stability on the course.
FAQs about Changing Spikes on Golf Shoes
Why should I change the spikes on my golf shoes?
Changing spikes helps maintain traction and stability on the course, ensuring better performance and safety.
How often should I replace my golf shoe spikes?
It’s recommended to check your spikes after every 10 rounds of golf or whenever you notice significant wear.
What tools do I need to change my golf shoe spikes?
You typically need a spike wrench or tool designed for your specific type of spikes.
Can I change spikes on any golf shoe?
Not all golf shoes have replaceable spikes. Check if your shoes are equipped with a spike system before attempting to change them.
What type of spikes should I use for my golf shoes?
Choose spikes that are compatible with your shoe’s brand and model, as well as appropriate for the course conditions (soft or hard ground).
Is it difficult to change the spikes?
No, changing spikes is a straightforward process that can usually be done in just a few minutes with the right tools.
Conclusion
Changing the spikes on your golf shoes might seem like a daunting task, but with the right tools and instructions, it’s entirely manageable. Properly maintained spikes can significantly enhance your performance, providing the grip and stability needed to play your best game. By following our step-by-step guide and maintenance tips, you’ll ensure your golf shoes are always in top condition, ready to support you on the greens.
For those who want to take their golf game to the next level, consider booking a call with one of our shoe maintenance experts. They can offer personalized advice and further tips to keep your equipment in the best possible shape. Happy golfing!


