Watches are more than just tools to tell time; they are fashion statements, sentimental items, and functional accessories all rolled into one. Whether you’re a watch collector, a DIY enthusiast, or someone who loves to accessorize, dealing with a broken watch band can be a frustrating experience. Learning how to fix a broken watch band at home can save you time, money, and the hassle of finding a professional. In this guide, we’ll take you through the step-by-step process of repairing your watch band, ensuring that you can get back to wearing your favorite timepiece in no time.
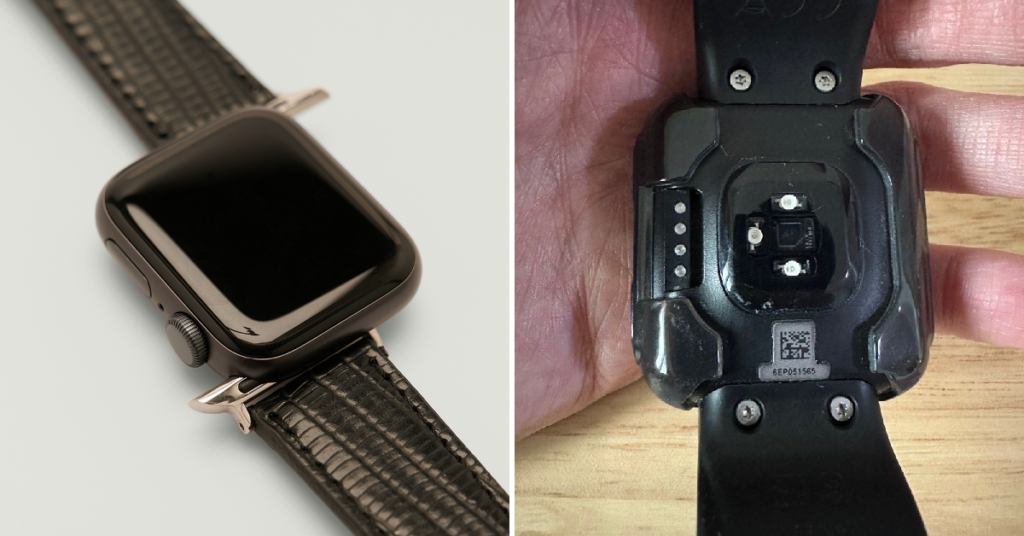
Understanding Watch Band Types and Common Breakages
Watch bands come in various materials, and each type has its own set of common breakages and damages. Metal bands, for instance, often suffer from broken links or damaged clasps. Leather bands can wear out or tear, especially where they attach to the watch face. Rubber and fabric bands may snap or become frayed over time. Understanding the type of material your watch band is made of and the common issues it faces will help you diagnose the problem accurately and choose the right repair method.
Metal watch bands are durable but can develop issues such as broken links, damaged clasps, or loose pins. Leather watch bands, while elegant, are prone to wear and tear, especially around the edges and where they connect to the watch face. Rubber bands, often used in sports watches, can become brittle and snap, while fabric bands, popular in casual watches, can fray and weaken. By identifying these common breakages, you can better prepare for the repair process.
Knowing the material and common issues associated with your watch band also allows you to gather the appropriate tools and replacement parts. For example, metal bands require different tools and parts compared to leather or rubber bands. With this knowledge, you’re ready to move on to the next step in the repair process—gathering your tools.
Tools Needed for Repairing a Watch Band
Repairing a watch band requires specific tools tailored to the type of band you’re working with. A spring bar tool is essential for almost all types of watch bands, as it helps remove and reattach spring bars holding the band in place. Jewelry pliers are useful for adjusting metal links or tightening screws. A pin pusher and a small hammer are necessary for removing and inserting pins in metal bands. For leather bands, a leather punch and a set of needles and thread are required for sewing or reinforcing the material.
Having the right tools is crucial for a successful repair. A spring bar tool, for instance, allows you to easily remove and reattach the band to the watch face. Jewelry pliers enable you to manipulate small metal parts with precision. A pin pusher and a small hammer are indispensable for working with metal bands, while a leather punch helps create clean holes in leather bands. Needles and thread are essential for stitching leather bands, ensuring a durable repair.
Repairing a watch band requires specific tools for the type of band, List of tools::
- Spring bar tool: Essential for removing and reattaching spring bars. Facilitates easy removal and reattachment of the band.
- Jewelry pliers: Useful for adjusting metal links or tightening screws. Allow precise manipulation of small metal parts.
- Pin pusher and small hammer: Necessary for removing and inserting pins in metal bands. Indispensable for handling metal bands.
- Leather punch, needles, and thread: Needed for sewing or reinforcing leather bands. Creates clean holes in leather bands.
- Needles and thread: Essential for stitching leather bands.
Investing in a quality watch repair kit that includes these tools can save you time and effort in the long run. Many kits also come with additional items like extra spring bars, replacement pins, and small screwdrivers, providing everything you need to tackle various watch band repairs. With your tools ready, you’re now prepared to start the repair process.
Step-by-Step Guide to Fixing a Broken Watch Band
Follow these detailed steps to repair or replace a broken watch band and restore your timepiece to its former glory.
Step 1: Identify the Type of Watch Band and the Broken Part
The first step in fixing a broken watch band is to identify the type of band and the specific issue. Examine the material—whether it’s metal, leather, rubber, or fabric—and look closely at the damaged area. This will help you determine the best approach for the repair. For example, if you have a metal band with a broken link, you’ll need to either repair the link or replace it. If your leather band has a tear, you may need to sew it or replace a section of the leather.
Understanding the material and the specific issue is crucial for a successful repair. Take your time to thoroughly inspect the band and note any additional problems that may need attention. This will ensure that you address all issues during the repair process, preventing future breakages.
Once you’ve identified the type of band and the broken part, gather the necessary tools and replacement parts. This preparation will make the repair process smoother and more efficient, allowing you to focus on the task at hand.
Step 2: Remove the Old Band if Necessary
If the damaged band needs to be replaced or repaired off the watch, you’ll need to remove it first. Use the spring bar tool to carefully push the spring bar out of its slot, releasing the band from the watch face. Be gentle to avoid scratching the watch or damaging the spring bar. If you’re working with a metal band, you may need to use jewelry pliers to loosen any screws or pins holding the band in place.
Removing the old band allows you to work more comfortably and accurately on the damaged area. It also gives you a chance to clean the watch face and the attachment points, ensuring a secure and polished final result. Take your time during this step to avoid any unnecessary damage to the watch or the band.
With the old band removed, you’re ready to assess the damage and determine if a replacement part is needed. This step is crucial for planning the next stages of the repair process and ensuring that you have all the necessary parts and tools.
Step 3: Assess the Damage and Determine if a Replacement Part is Needed
Carefully examine the damaged part of the watch band to determine if it can be repaired or if it needs to be replaced. For metal bands, check if the broken link or clasp can be fixed or if it requires a new component. For leather bands, assess the tear to see if it can be sewn or if a new section of leather is needed. For rubber and fabric bands, check for any signs of brittleness or fraying that may necessitate a complete replacement.
Assessing the damage accurately ensures that you choose the right repair method and replacement parts. If the damage is minor, you may be able to fix it with simple tools and techniques. However, if the damage is extensive, replacing the broken part may be the best solution for a durable and reliable repair.
Once you’ve assessed the damage and determined whether a replacement part is needed, make a list of the parts required for the repair. This preparation will streamline the repair process and ensure that you have everything you need to proceed.
Step 4: Choosing and Finding Replacement Parts
Selecting the correct replacement parts is crucial for a successful repair. For metal bands, you’ll need to find links, clasps, or pins that match the original design and size. For leather bands, choose leather pieces that match the color, texture, and thickness of the original band. For rubber and fabric bands, look for high-quality, durable materials that can withstand daily wear and tear.
To find quality replacement parts, consider visiting local watch repair shops, online marketplaces, or specialized retailers. Many watch brands also offer replacement parts through their official websites. Investing in high-quality parts ensures that your repair will be durable and long-lasting, restoring the watch band to its original functionality and appearance.
With the replacement parts in hand, you’re ready to start the actual repair process. Take your time to choose the best parts for your watch band, as this will significantly impact the final result.
Step 5: Repairing the Broken Part or Replacing with New Parts
Now that you have the necessary tools and replacement parts, it’s time to repair the broken watch band. Follow these instructions based on the type of watch band you’re working with:
Repairing a Broken Metal Watch Band:
For metal bands, use the jewelry pliers to remove the damaged link or clasp. Insert the replacement part and secure it with a new pin or screw. Ensure that all connections are tight and secure to prevent future breakages. If you’re replacing multiple links, take your time to align them properly.
Fixing a Leather Watch Band:
For leather bands, use the leather punch to create clean holes if needed. Thread a needle with strong, durable thread and carefully sew the torn or damaged area. Make small, even stitches to ensure a neat and strong repair. If you’re replacing a section of leather, cut the new piece to size and sew it in place.
Replacing a Broken Rubber or Fabric Watch Band:
For rubber and fabric bands, remove the damaged part and attach the replacement band using the spring bar tool. Ensure that the band is securely attached to the watch face and that all connections are tight. Check for any signs of weakness or potential issues before considering the repair complete.
Step 6: Reattach the Watch Band or the Repaired Part
Once the repair is complete, reattach the watch band to the watch face using the spring bar tool. Ensure that the spring bars are securely in place and that the band is properly aligned with the attachment points. Test the band for any signs of looseness or weakness, making adjustments as needed to achieve a secure fit.
Reattaching the watch band is the final step in the repair process. Take your time to ensure that everything is properly secured and aligned, as this will ensure the durability and functionality of the repaired band. With the band reattached, your watch is ready to wear once again.
Testing the Repair for Durability
After completing the repair, it’s important to test the watch band for strength and durability. Wear the watch for a few hours and check for any signs of discomfort, looseness, or weakness in the repaired area. Perform simple activities to ensure that the band can withstand daily wear and tear without any issues.
Testing the repair ensures that the band is reliable and secure, giving you confidence in your DIY skills. If you notice any issues during the testing phase, make the necessary adjustments to reinforce the repair. This proactive approach will help prevent future breakages and extend the life of your watch band.
By thoroughly testing the repair, you can be confident that your watch band is ready for daily use. Enjoy the satisfaction of knowing that you successfully repaired your watch band at home.
Tips and Tricks for Preventing Future Breakages
- Regularly clean the watch band to remove dirt, sweat, and oils.
- Use a soft cloth and mild soap for metal bands to clean links and clasps.
- Apply leather conditioner to leather bands to keep them supple and prevent cracks.
- Rinse rubber and fabric bands with water and let them air dry.
- Avoid exposing the band to extreme temperatures, moisture, and chemicals.
- Remove the watch during activities that stress the band, like heavy lifting or water sports.
- Store the watch in a cool, dry place when not in use.
Proper maintenance extends the life of the watch band and keeps the timepiece functional and stylish.
FAQs about Fixing a Broken Watch Band at Home
What tools do I need to fix a broken watch band?
To fix a watch band at home, you’ll generally need a small screwdriver, spring bar tool, tweezers, and replacement parts like spring bars or links, depending on the issue.
Can I fix a leather watch band myself?
Yes, a leather watch band can often be repaired with simple tools like a needle and strong thread for stitching or glue for minor tears. If the damage is extensive, consider replacing the band entirely.
How do I know if I need to replace the entire watch band?
If the damage is beyond repair, such as deep tears in leather or significant breaks in metal links, it may be best to replace the whole band. For minor issues like loose pins, repairs are typically sufficient.
How do I replace a broken spring bar in a watch band?
You can replace a broken spring bar by using a spring bar tool to remove the old one and insert a new one. Make sure to get the correct size for your watch.
Are metal watch bands easy to fix?
Yes, metal watch bands can often be fixed at home, especially if the issue is with a missing or loose link. However, more complex issues may require professional repair.
Can I use glue to fix a broken watch band?
Glue can be used for minor repairs, especially with leather or fabric bands, but it’s not recommended for long-term fixes on metal or plastic bands.
How long does a typical watch band repair take?
Most simple repairs, like replacing a spring bar or link, take about 15-30 minutes. More complex repairs may take longer depending on the tools and experience level.
How do I avoid breaking my watch band in the future?
To prevent future damage, regularly check your watch band for loose parts, avoid exposing it to extreme conditions, and ensure it fits properly to avoid strain.
Conclusion
Fixing a broken watch band at home is a valuable skill that can save you time and money while allowing you to enjoy your favorite timepieces without interruption. By understanding the type of watch band, gathering the necessary tools, and following the step-by-step repair process, you can successfully repair your watch band and restore its functionality and appearance.
Remember to test the repair for durability and follow maintenance tips to prevent future breakages. With these tips and tricks, you’ll be able to confidently tackle any future watch band repairs. Happy repairing!
